Laminate flooring remains one of the most popular flooring options in Dublin today. Whether you’re renovating a semi-detached family home in Clondalkin, updating a rental apartment in the Docklands, or refreshing a terraced house in Phibsborough, laminate offers a reliable, durable, stylish, and cost-effective flooring solution. With an enormous range of colours, grains, widths, and finishes, it can emulate the look of real wood without the associated maintenance challenges, a welcome benefit given Ireland’s variation in indoor humidity levels throughout the year.
However, despite its popularity, proper installation is key to achieving a floor that looks seamless, feels stable, and lasts for decades. Laminate flooring can absolutely be installed by DIY enthusiasts, but installation is not simply a matter of clicking boards together. It requires careful subfloor preparation, selection of the correct underlay for Irish conditions, correct expansion spacing, and thoughtful planning to ensure visual flow across rooms and hallways.
To guide you through the process, this article presents a comprehensive, step-by-step approach rooted in real experience from Dublin flooring fitters. You will learn:
How to assess your subfloor (common issues in Dublin housing stock)
How to select an underlay suitable for Irish humidity and sound requirements
The correct installation process for click-fit laminate boards
How to deal with radiators, door frames, uneven floors, and stair transitions
Maintenance and long-term care recommendations
When it makes sense to hire a professional installer
This guide also highlights the role of FBS Flooring, located at Unit J2 Malahide Road Industrial Estate, Dublin D17 FR58, whose experienced fitters regularly work in homes across Dublin City, Northside, Southside, Meath, and Fingal, offering expert installation and advice backed by years of hands-on fitting experience.
Why Laminate Flooring Works So Well in Dublin Homes
Laminate has evolved considerably over the past decade. The boards are now thicker, more stable, and often water-resistant, making them suitable for kitchens, hallways, bedrooms, and even high-traffic living spaces. Dublin homeowners particularly appreciate laminate for the following reasons:
1. Style and Versatility
Laminate can convincingly replicate oak, ash, walnut, grey barn-style boards, or clean Scandinavian-inspired tones. It fits both Georgian terraces and new-build apartments.
2. Cost-Effective without Sacrificing Style
A high-quality laminate floor can bring a premium interior look without the price tag of engineered or solid wood.
3. Easy Maintenance
Wipe-clean, scratch-resistant coatings make laminate ideal for households with children or pets — a reality in most family homes around Dublin suburbs.
4. DIY-Friendly Installation
The modern click-lock system allows boards to be fitted without adhesives or nails.
5. Suitable for Irish Heating Conditions
Laminate works well with:
Traditional radiators
Underfloor heating (when compatible underlay is used)
This makes it especially suitable for new builds in Lucan, Leopardstown, Balbriggan, and Adamstown.
Understanding Dublin’s Subfloors and Moisture Conditions
One of the most common causes of flooring failure is incorrect assessment of the subfloor. Dublin’s housing stock is diverse, and older properties often present challenges that must be addressed before fitting laminate.
Common Dublin Subfloor Types
Subfloor Type
Typical Location
Notes for Installation
Concrete Slabs
Most modern homes & extensions
Must include a moisture barrier underlay to prevent cupping or swelling.
Timber Suspended Floors
Older terraced & pre-1970 houses
Check for sag, squeaks, and uneven boards; reinforce where necessary.
Existing Tiles, Vinyl, or Laminate
Renovations where flooring was layered over time
Can often be installed over if secure and level, otherwise remove.
Moisture Matters and Irish Homes Have Plenty of It
Because of changing indoor humidity (especially from autumn to winter), laminate flooring must acclimate in the room for 48 hours before installation. Skipping this step often leads to:
Lifting edges
Board gaps
Buckling
Local Professional Insight: Homes near the coast (Howth, Clontarf, Portmarnock) tend to retain indoor humidity longer. Never skip acclimation.
Tools & Materials Checklist
The following tools will help achieve a clean, stable, professional-looking installation:
Tools
Tape measure
Pencil & try-square
Handsaw or jigsaw (for cut-outs and curves)
Circular saw or laminate cutter (optional for faster work)
Rubber mallet
Pull bar & tapping block (essential for tight spaces)
Spirit level or straight-edge level
Utility knife for underlay trimming
Materials
Laminate flooring (allow + 10% extra for cuts)
Suitable underlay (details below)
Damp Proof Membrane (if not built into underlay)
Scotia beading or new skirting
Door bars/thresholds
Silicone edging sealant (optional for kitchens)
Choosing the Right Underlay for Dublin Conditions
Underlay does far more than soften footsteps — it impacts noise, insulation, and moisture protection.
Underlay Type
Best Use Case
Why It Matters in Dublin
Moisture-Barrier (DPM)
Concrete floors (very common)
Prevents rising damp — essential in Irish climate.
Acoustic Underlay
Apartments / duplexes
Helps meet building sound-transfer regulations.
Thermal Underlay
Cold ground-floor rooms
Enhances warmth in winter, reduces heat loss.
Underfloor Heating-Compatible Underlay
Homes with UFH
Must allow heat transfer while protecting boards.
Professional Tip: If in doubt, choose acoustic with DPM — it is the safest all-round option across Dublin.
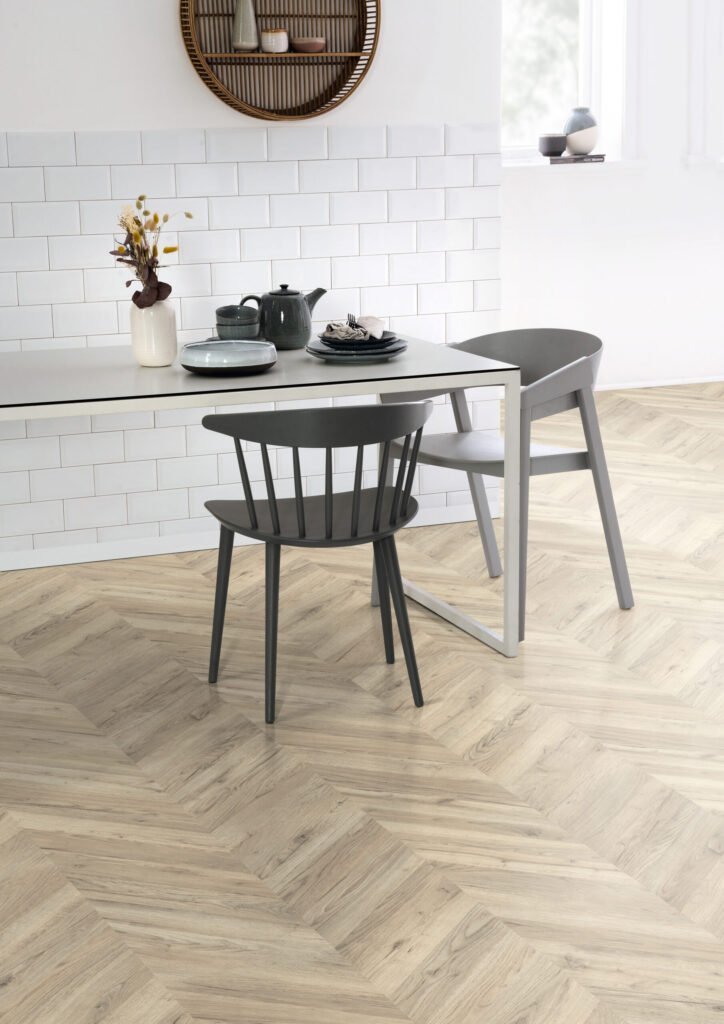
application;Dinningroom;chair;window;flower;cup
Preparing the Room Correctly
This is the stage DIY installers most often rush — yet it affects the final quality more than any other.
1. Remove or Lift Existing Flooring
Leave tiles only if:
They are secure
They are level
They are not hollow underneath
2. Inspect the Subfloor for Levelness
Laminate requires a level surface:
No dips more than 2mm per metre
Use self-leveling compound on concrete
Sand or replace boards on timber floors
Dublin Example: Many older terraced homes in Drumcondra and Ringsend have “dished” floors toward fireplaces. Leveling is required to avoid future creaking.
3. Decide Between Skirting Removal or Scotia Beading
Removing skirting → cleanest professional finish
Using scotia → easier DIY method
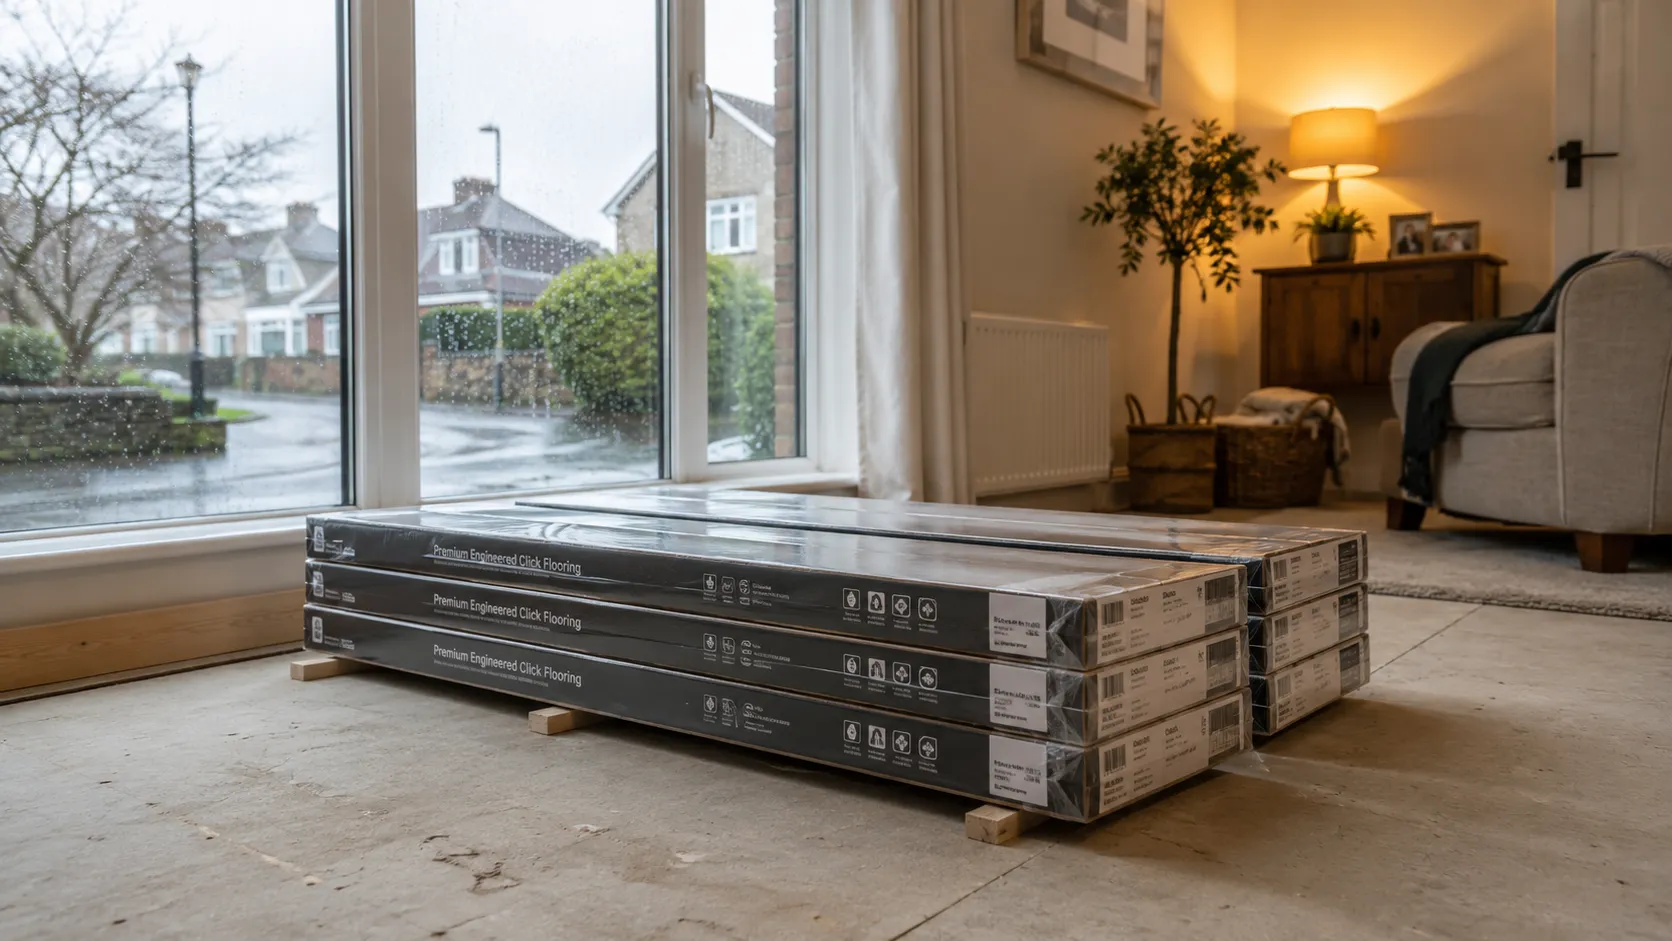
4. Acclimate the Flooring
Place unopened packs flat in the room for 48–72 hours.
Do not store them in hallways, sheds, or other rooms — acclimation must match final room temperature.
Step-by-Step Installation: The Click-Fit Method
Step 1: Lay the Underlay
Ensure it lays completely flat
Run it wall-to-wall
Seal overlaps with aluminium tape
Avoid creases — they cause hollow-sounding spots
Step 2: Plan Your Board Direction
Boards typically look best when:
Laid parallel to the longest wall, or
Laid in the direction of main light entry
This creates visual flow and makes narrow rooms feel more spacious.
Dublin Tip: Hallways always look best when laminate runs lengthwise, not across.
Step 3: Creating Expansion Gaps
Laminate must expand and contract with temperature and humidity:
Leave 10–12mm around all edges
Use plastic spacers during installation
Never push boards tight against radiator pipes or walls
Step 4: Laying Your First Rows
Start along the straightest wall.
Position the tongue side toward the wall.
Click each board at a 30° angle into the previous row.
Tap lightly using a tapping block.
Step 5: Cutting Boards to Fit
Use:
A jigsaw for curved cuts (radiator pipes, room corners)
A fine-tooth saw for straight cuts
A pull-bar for tight final rows
Dublin Heating Note: When cutting around radiator pipes, leave an extra 2–3mm and cover with pipe rose trims.
Step 6: Fitting Door Frames and Thresholds
For interior doors, the laminate should slide under the door frame. Cut the bottom of the frame using a jigsaw or a piece of laminate as a cutting reference.
Step 7: Finishing Touches
Install scotia or re-fix skirting
Nail scotia to the wall, not to the floor
Install door bars flush — avoid raised trip edges
Vacuum and wipe the floor to remove fine sawdust
Common Dublin Installation Problems (and Solutions)
Problem
Cause
Fix
Creasing sound
Underlay overlapping or buckling
Use levelling compound or replace the timber sheet
Gaps appearing later
Skipped acclimation period
Relay underlay flat and re-lay the section
Board sag
Subfloor uneven
Use levelling compound or replace timber sheet
Cost of Laminate Flooring Installation in Dublin
DIY vs Professional Comparison
Expense
DIY Cost
Professional Installation (Typical Dublin Rates)
Laminate Material
€10–€35 per m²
€10–€35 per m²
Underlay
€3–€12 per m²
€3–€12 per m²
Tools & Consumables
€40–€150
Included in service
Labour Cost
Free
€12–€20 per m²
Skirting / Scotia
€20–€70
€20–€70 + fitting charge
Total DIY for average 20m² room: €350–€700 Total Professional: €550–€1,100+
Why Many Dublin Homeowners Choose FBS Flooring
Located at Unit J2 Malahide Road Industrial Estate, Dublin D17 FR58, FBS Flooring is widely trusted because:
Provides clear advice about which underlay is suitable for your home.
Fitters have years of hands-on installation experience in Dublin properties.
Handles complex fitting scenarios like uneven floors, stairs, hallways, and transitions.
Delivers clean, precise finishing, especially around doors and skirting.
Offers transparent pricing and free measurement consultations.
If you want a floor that feels solid, looks seamless, and lasts decades professional fitting makes a difference. FBS Flooring has become a go-to choice for homeowners who value lasting quality over short-term shortcuts.
Maintenance & Care for Dublin Homes
Sweep or vacuum regularly (use soft brush attachment).
Use slightly damp rather than wet mops.
Do not allow water to pool near balcony doors.
Use felt pads under furniture legs.
Keep humidity stable during winter heating cycles.
Frequently Asked Questions
Can I use laminate in kitchens? Yes, provided it’s water-resistant and spills are cleaned quickly.
Can laminate be installed over old tiles? Yes, if the tiles are firm and level.
Do I need an underlay on concrete? Yes, always with moisture protection.
How long does laminate last? 10–25 years, depending on usage and quality.
Is the laminate noisy? It can be. Acoustic underlay significantly reduces noise — very important in apartments.
Can laminate go with underfloor heating? Yes, if both laminate and underlay are UFH-compatible.
How soon can I walk on the laminate after installation? Immediately after fitting (no adhesives required).
How can I avoid gaps forming later? Acclimate boards for 48+ hours and maintain humidity.
Which way should the laminate run in hallways? Lengthwise down the hallway for visual continuity.
Should skirting be removed? It creates a cleaner finish, but scotia is fine for DIY installs.
How do I handle radiator pipes? Cut circular holes and cover with pipe collars.
What’s the difference between 7mm and 12mm laminate? Thicker boards feel more solid, reduce sound, and last longer.
Facebook
Pinterest
LinkedIn
X
10 Responses
Awesome blog you have here but I was curious about if you knew of any discussion boards that cover the same topics talked about here? I’d really love to be a part of online community where I can get opinions from other experienced individuals that share the same interest. If you have any recommendations, please let me know. Bless you!
I loved as much as you will receive carried
out right here. The sketch is tasteful, your authored subject matter stylish.
nonetheless, you command get bought an impatience over that
you wish be delivering the following. unwell unquestionably come more formerly again as
exactly the same nearly a lot often inside case you shield this increase.
What’s Taking place i’m new to this, I stumbled upon this I have found It
absolutely useful and it has aided me out loads. I hope to contribute & aid other customers
like its helped me. Good job.
SPC flooring is a 100% waterproof, rigid-core vinyl floor built around a dense stone-polymer composite — limestone powder blended with PVC and stabilisers. It clicks
Acclimatising flooring in Ireland means letting your boards adjust to the temperature and humidity of the actual room before they are fitted. Store the packs
Manage Consent
To provide the best experiences, we use technologies like cookies to store and/or access device information. Consenting to these technologies will allow us to process data such as browsing behavior or unique IDs on this site. Not consenting or withdrawing consent, may adversely affect certain features and functions.
Functional
Always active
The technical storage or access is strictly necessary for the legitimate purpose of enabling the use of a specific service explicitly requested by the subscriber or user, or for the sole purpose of carrying out the transmission of a communication over an electronic communications network.
Preferences
The technical storage or access is necessary for the legitimate purpose of storing preferences that are not requested by the subscriber or user.
Statistics
The technical storage or access that is used exclusively for statistical purposes.The technical storage or access that is used exclusively for anonymous statistical purposes. Without a subpoena, voluntary compliance on the part of your Internet Service Provider, or additional records from a third party, information stored or retrieved for this purpose alone cannot usually be used to identify you.
Marketing
The technical storage or access is required to create user profiles to send advertising, or to track the user on a website or across several websites for similar marketing purposes.

10 Responses
Awesome blog you have here but I was curious about if you knew of any discussion boards that cover the same topics talked about here? I’d really love to be a part of online community where I can get opinions from other experienced individuals that share the same interest. If you have any recommendations, please let me know. Bless you!
If you want we can connect with one expert, just say the word and we can give you the contacts.
Rattling superb information can be found on web blog.
I loved as much as you will receive carried
out right here. The sketch is tasteful, your authored subject matter stylish.
nonetheless, you command get bought an impatience over that
you wish be delivering the following. unwell unquestionably come more formerly again as
exactly the same nearly a lot often inside case you shield this increase.
It’s not my first time to pay a visit this website, i am browsing this web site dailly and take nice data from here daily.
excellent points altogether, you just gained a logo new reader.
What would you suggest about your put up that you just made
a few days in the past? Any sure?
I am really thankful to the owner of this web site
who has shared this great paragraph at at this place.
I always emailed this web site post page to all my associates, for the reason that if like to read it next mmy links will too.
What’s Taking place i’m new to this, I stumbled upon this I have found It
absolutely useful and it has aided me out loads. I hope to contribute & aid other customers
like its helped me. Good job.
Asking questions are in fact pleasant thing if you are not understanding something totally, however this post presents good understanding yet.